

Putting a camera on a tripod ensures sharp, stable photos and videos, opening up creative possibilities. The process involves attaching a quick release plate to your camera’s tripod socket, then securely mounting that plate into the tripod head’s clamp. Always double-check your connections and balance your gear for optimal stability, preventing accidental drops and ensuring professional-looking results. Proper setup is key to getting the most out of your photographic equipment and protecting your investment.
Hello, fellow photographers and videographers! Have you ever tried to capture a stunning long-exposure shot, a crisp landscape, or a perfectly still video, only to find your images are blurry or shaky? It’s a common frustration, and often, the simple solution lies in one essential piece of gear: the tripod. A tripod is much more than just three legs; it’s the foundation for sharp, stable, and professional-looking photos and videos. It unlocks creative techniques like time-lapses, self-portraits, and precise compositions.
But owning a tripod is only half the battle. Knowing how to properly put a camera on a tripod is absolutely crucial. A poorly mounted camera isn’t just a recipe for shaky shots; it’s a disaster waiting to happen. An expensive camera hitting the ground because of a loose connection or improper balancing is a nightmare no one wants to experience. Don’t worry, though! This comprehensive guide is here to walk you through every step, ensuring your camera is always safe, secure, and ready to capture amazing imagery.
Whether you’re a beginner just starting your photographic journey or a seasoned enthusiast looking for a quick refresher, understanding the correct way to mount your camera is fundamental. We’ll cover everything from identifying the right parts to crucial safety checks and advanced tips. By the end of this article, you’ll be a pro at attaching your camera, ready to tackle any shooting scenario with confidence and precision. So, let’s dive in and learn how to put a camera on a tripod like a true expert!
Key Takeaways
- Quick Release Plate is Key: Always attach the quick release plate securely to your camera’s tripod socket *first*. This plate is the intermediary between your camera and the tripod head, ensuring a stable connection.
- Understand Your Tripod Head: Familiarize yourself with how your specific tripod head (e.g., ball head, pan-tilt head) locks and releases the quick release plate. Different heads have varying clamping mechanisms.
- Ensure a Secure Connection: After mounting your camera, always perform a gentle “wiggle test” to confirm it’s firmly seated and locked onto the tripod head. Never rely solely on sound or feel.
- Balance Your Setup: Once attached, balance your camera and lens over the tripod’s center of gravity. Adjust the head and tripod legs as needed to prevent tipping and reduce strain on the head.
- Use Caution with the Center Column: While it adds height, extending the center column significantly reduces stability. Use it sparingly, especially with heavy gear or in windy conditions.
- Safety First: Before attaching your camera, ensure your tripod is on a stable, level surface. Always keep a hand on your camera until you are absolutely certain it is secure.
- Practice Makes Perfect: The more you practice attaching and detaching your camera, the faster and more intuitive the process becomes, allowing you to focus on capturing great shots.
Quick Answers to Common Questions
How do I know if my quick release plate is compatible with my tripod head?
Check the manufacturer’s specifications for both your tripod head and quick release plate. The most common universal standard is Arca-Swiss, but many brands like Manfrotto have their own proprietary systems. If they are from the same brand, they are usually compatible.
What is the little screw on the quick release plate for?
The screw on the quick release plate is designed to fit into the standard 1/4″-20 threaded socket on the bottom of your camera, securely attaching the plate to your camera body.
Can I leave the quick release plate on my camera all the time?
Yes, many photographers leave the quick release plate on their camera, especially if they use a tripod frequently. Just be aware it adds a small amount of bulk to the camera’s bottom.
My camera feels wobbly even after tightening. What should I do?
First, double-check that the quick release plate is fully tightened to your camera. Then, ensure the plate is fully seated and locked into the tripod head’s clamp. If still wobbly, inspect for any damage to the plate or head. Sometimes, cheaper tripods may have inherent wobble.
How do I balance a heavy lens on a tripod?
If your heavy lens has its own tripod collar, attach the quick release plate to the lens collar instead of the camera body. This allows you to balance the entire setup more effectively directly under the lens’s center of gravity.
📑 Table of Contents
- Understanding Your Gear: The Foundation of Security
- Preparing for Attachment: Safety First!
- Attaching the Quick Release Plate to Your Camera: The First Crucial Step
- Mounting the Camera (with Plate) to the Tripod Head: The Main Event
- Balancing and Securing Your Setup: Optimal Performance and Protection
- Best Practices and Advanced Tips: Maximizing Your Tripod Experience
- Conclusion: Master the Mount, Master Your Photography
Understanding Your Gear: The Foundation of Security
Before we even think about attaching anything, it’s vital to understand the components involved. Knowing your gear will make the process much smoother and ensure you use everything correctly. Think of it as getting to know your tools before you start building.
Tripod Types: Not All Legs Are Created Equal
Tripods come in various shapes, sizes, and materials, each designed for specific purposes.
- Travel Tripods: These are often lightweight and compact, perfect for hiking or flying. They might sacrifice some stability for portability, but are incredibly convenient.
- Studio/Heavy-Duty Tripods: These are larger, heavier, and built for maximum stability. They are ideal for studio work, supporting large telephoto lenses, or video productions where portability isn’t the primary concern.
- Monopods: While not a tripod, a monopod is a single leg support. It offers more stability than handheld shooting but less than a full tripod. They are great for sports or events where quick movement is required.
For this guide, we’ll focus on traditional three-legged tripods, as they are the most common for stationary work.
Tripod Heads: The Brains of the Operation
The tripod head is the part that holds your camera and allows you to adjust its angle and orientation. This is where most of the magic happens when you put a camera on a tripod.
- Ball Head: This is the most common type for photography. It uses a single ball joint to allow for quick, fluid movement in almost any direction. It usually has one or two locking knobs: one for the ball and sometimes another for panning.
- Pan-Tilt Head: Often found on video tripods or for precise landscape/architecture photography. It has separate controls for horizontal (pan) and vertical (tilt) movement, offering more controlled adjustments.
- Gimbal Head: Specifically designed for very heavy, long telephoto lenses. It balances the camera and lens perfectly, allowing for effortless movement, which is essential for wildlife and sports photography.
Most beginner and intermediate photographers will likely encounter ball heads or pan-tilt heads. The principle of attachment remains largely the same across these types, focusing on the quick release plate.
Quick Release Plates: The Crucial Link
This small but mighty plate is perhaps the most important component when learning how to put a camera on a tripod. It’s a small piece of metal or plastic that screws onto the bottom of your camera. The plate then quickly and easily slots into a clamp on your tripod head, allowing for fast attachment and detachment.
Different manufacturers use different styles of quick release plates. The most common are:
- Arca-Swiss Style: This is a very popular, universal standard. Many manufacturers make Arca-Swiss compatible plates and clamps, meaning you can often mix and match brands.
- Manfrotto Style: Another popular system, but typically proprietary to Manfrotto tripods. These plates are often recognizable by their rectangular shape.
- Proprietary Systems: Some tripods come with their own unique plate designs that only work with that specific tripod head. It’s important to know which type your tripod uses.
Always ensure your quick release plate matches the clamp on your tripod head. If you have multiple tripods or camera bodies, consider getting an Arca-Swiss compatible system for maximum versatility across your gear.
Camera Tripod Socket: The Connection Point
Every modern camera (DSLR, mirrorless, some compacts) has a standard 1/4″-20 threaded hole on its bottom plate. This is the universal tripod socket where your quick release plate will attach. Some heavier camera bodies or telephoto lenses might also have a larger 3/8″-16 socket, but the vast majority of consumer camera bodies use the smaller 1/4″-20 thread. The quick release plate you use will have a screw that fits this standard size.
Preparing for Attachment: Safety First!
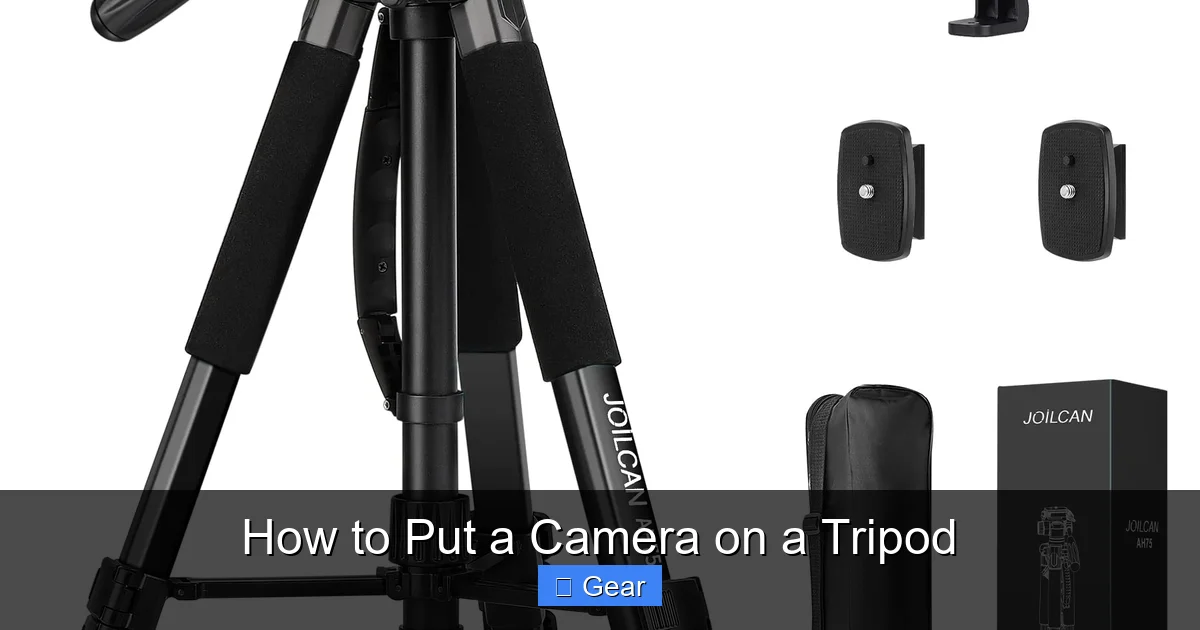
Visual guide about How to Put a Camera on a Tripod
Image source: m.media-amazon.com
Before you even think about connecting your camera, it’s essential to set up your tripod correctly and safely. A stable foundation is key to protecting your expensive gear and ensuring sharp images.
Clear Your Workspace
Find a flat, clear, and stable area to set up your tripod. Avoid uneven ground, loose rocks, or busy walkways where your tripod could be bumped or tipped. If you’re indoors, ensure you have enough space around you to maneuver without obstacles.
Extend Legs Properly: The Rule of Three
Extend all three tripod legs. For maximum stability, always extend the thickest sections of the legs first. If you need more height, extend the thinner sections next. Spread the legs out wide enough to create a broad base. This lowers the center of gravity and makes the tripod much more stable. Some tripods have angle stops; make sure they are fully engaged for security. Never leave one leg shorter or at a different angle unless absolutely necessary for a specific shot on uneven terrain, and even then, do so with extreme caution.
Ensure Stability and Levelness
Once the legs are extended, gently press down on the tripod head to ensure all legs are firmly planted. If your tripod has a bubble level (many do, either on the head or the legs), use it to make sure the tripod is level. A level base makes balancing your camera much easier later on and ensures straight horizons in your photos. This initial leveling will save you time later.
Attaching the Quick Release Plate to Your Camera: The First Crucial Step
This is where the actual physical connection begins. Take your time with this step; a secure quick release plate is paramount for the safety of your camera.
Locating the Tripod Socket
Flip your camera upside down. You’ll easily spot the small, threaded hole, usually near the center of the camera body, but sometimes offset. This is your 1/4″-20 tripod socket.
Orienting the Plate Correctly
Take your quick release plate. It has a screw with a D-ring, a flip-out handle, or a slot for a coin or Allen key. Place the plate against the bottom of your camera, making sure the screw aligns with the tripod socket.
Important: Many quick release plates have rubber pads. These pads provide crucial grip and prevent the plate from scratching your camera. Ensure these pads are flat against the camera body. Some plates also have an arrow or indicator for the lens direction; try to align this for better balance, though it’s not strictly necessary for basic security.
Tightening Securely: No Half Measures!
Once aligned, start turning the screw clockwise into the tripod socket.
- For D-ring or flip-out handle screws: Simply twist the D-ring or handle until it’s hand-tight. Then, give it an extra turn with some firm pressure to ensure it’s snug.
- For coin-slot or Allen key screws: Use a coin (like a quarter or nickel) or the supplied Allen key to tighten the screw. Turn it until it’s very snug. You don’t need to overtighten it to the point of stripping the thread, but it should be firm enough that the plate doesn’t wiggle at all.
Double-Checking Your Work
After tightening, gently try to twist the quick release plate on the camera body. It should *not* move independently of the camera. If it wiggles even slightly, tighten it more. This is a critical safety check. A loose plate is the primary cause of cameras falling off tripods. This quick check takes seconds and can save you hundreds, if not thousands, of dollars in damage.
Mounting the Camera (with Plate) to the Tripod Head: The Main Event
Now that your quick release plate is firmly attached to your camera, it’s time to connect it to the tripod head. This is the moment when your camera officially becomes part of the tripod system.
Releasing the Clamp on the Tripod Head
Every tripod head has a mechanism to open and close the clamp that holds the quick release plate.
- Lever Release: Many heads use a lever. Flip the lever to the “open” position. Some levers have a safety catch that needs to be pressed before the lever can fully open.
- Knob Release: Others use a screw knob. Turn the knob counter-clockwise to loosen and open the clamp jaws. Continue turning until the jaws are wide enough.
Make sure the clamp is wide open enough to easily accept your quick release plate without forcing it. It’s helpful to hold your camera with one hand while operating the clamp with the other.
Aligning the Plate with the Clamp
Look at the quick release plate on your camera and the open clamp on the tripod head. Notice the grooves, rails, or guides on both. You need to align the quick release plate so it slides smoothly into the clamp. Many systems are designed to only fit in one or two orientations.
For Arca-Swiss style plates, they typically slide in from one end into the “V” shape of the clamp. For Manfrotto-style, they might drop in from the top or slide in and then click into a specific slot. Take a moment to understand how your particular plate and clamp interlock.
Sliding/Clicking into Place
Carefully insert the quick release plate (attached to your camera) into the open clamp on the tripod head.
- For sliding plates: Gently slide the plate into the clamp until it’s fully seated. You might feel a slight resistance or hear a soft click as it settles into place. Ensure it can’t slide any further.
- For drop-in plates: Position the plate directly over the clamp and lower it straight down until it clicks or sits firmly. You’ll often hear a distinct “click” sound.
Keep a firm grip on your camera throughout this step. Never let go until you are absolutely certain it is secure in the next step.
Locking the Clamp: The Final Security Measure
Once the plate is seated, it’s time to lock it down.
- Lever Release: Flip the lever firmly back to the “closed” or “locked” position. You might feel a satisfying snap. Ensure any safety catches re-engage.
- Knob Release: Turn the screw knob clockwise until the clamp jaws tighten firmly around the quick release plate. Make it snug, but again, don’t overtighten to the point of struggling to undo it later.
The “Wiggle Test”: Your Ultimate Safety Check
This is *the most important step* in ensuring your camera is securely mounted. After locking the clamp, gently try to wiggle the camera. Try to lift it slightly. It should feel rock-solid with no movement or play between the plate and the tripod head. If there’s any movement, even a tiny bit, unlock the clamp, reseat the plate, and lock it again. Repeat the wiggle test. Better safe than sorry! This test confirms you have successfully learned how to put a camera on a tripod.
Balancing and Securing Your Setup: Optimal Performance and Protection
Once your camera is securely mounted, the job isn’t quite done. Proper balancing ensures stability, reduces strain on your tripod head, and prevents accidental tipping, especially with heavier lenses.
Centering the Weight: Find the Sweet Spot
With the camera attached, observe its balance. If you have a heavy lens, the camera might be front-heavy.
- Adjusting the Plate: Some quick release plates or tripod heads allow for a small amount of forward/backward adjustment. Loosen the clamp slightly (just enough to allow movement, but not enough to release the camera!) and slide the camera/plate assembly until the lens is balanced over the tripod’s center. Then re-lock the clamp firmly.
- Adjusting the Head: For ball heads, loosen the main locking knob just enough to allow the camera to tilt freely. Let gravity find the natural balance point, then re-lock the ball head.
The goal is for the camera and lens combo to be as balanced as possible when the head’s adjustments are loose. This reduces the chance of it flopping forward or backward when you unlock the head for adjustments, and puts less stress on the locking mechanisms.
Adjusting Tripod Legs for Levelness and Stability
Even with a level base, you might need fine-tuning for your shot.
- Use the Bubble Level: If your tripod head has a bubble level, use it to ensure the camera itself is level, not just the tripod base. This is particularly important for landscape photography.
- Uneven Terrain: On slopes or uneven ground, you’ll need to adjust individual leg lengths to achieve a level shooting platform. Remember to spread the legs as wide as possible for maximum stability in these challenging situations.
Using the Center Column (with Caution)
Many tripods have a center column that can be extended for extra height. While convenient, extending the center column significantly reduces stability because it raises the camera’s center of gravity.
- Use as a Last Resort: Always try to get your desired height by extending the legs first. This provides the most stable configuration.
- Limit Extension: If you must use the center column, extend it only as much as necessary. Even a few inches can make a difference in stability.
- Counterweight: Some center columns have a hook at the bottom. You can hang a backpack or a sandbag from this hook to add stability, especially with heavier gear or in windy conditions.
Locking the Head: Ready for Action
Before you let go, ensure all adjustment knobs on your tripod head are firmly locked.
- Ball Head: Lock the main ball joint knob tightly. If it has a separate panning lock, engage that too.
- Pan-Tilt Head: Lock both the pan control (horizontal rotation) and the tilt control (vertical angle).
Your camera is now securely mounted, balanced, and ready for you to start composing your masterpiece!
Best Practices and Advanced Tips: Maximizing Your Tripod Experience
Knowing how to put a camera on a tripod is just the beginning. A few extra tips can enhance your experience and prolong the life of your gear.
Disconnecting Safely: The Reverse Process
When you’re done shooting, reverse the process carefully.
- Ensure the camera is level and stable before unlocking anything. If it’s tilted forward, it might suddenly drop when the clamp is released.
- Unlock the clamp on the tripod head (lever or knob).
- Grip the camera firmly with one hand and slide/lift it out of the clamp with the other.
- Immediately re-lock the empty clamp on the tripod head to prevent it from swinging open, getting damaged, or collecting dirt.
- Unscrew the quick release plate from your camera. It’s often best to remove the plate when not in use to reduce bulk, though some photographers leave it on if they use the tripod very frequently.
Transporting Your Tripod: Care and Protection
When moving your tripod, especially with the camera attached (which is generally *not* recommended for long distances), be mindful.
- Short Distances: For very short moves (e.g., a few feet to adjust position), you can keep the camera attached, but always carry the tripod with the legs fully collapsed, keeping a hand on the camera. Be extra careful on uneven ground.
- Long Distances/Travel: Always remove your camera from the tripod for transport. Collapsed the tripod legs fully and secure them with any straps or clips. Use a dedicated tripod bag or padded case for protection, especially if checking it on an airplane.
Cleaning and Maintenance: Keeping Your Gear Pristine
Tripods can get dirty, especially if used outdoors. Regular cleaning prolongs their life and ensures smooth operation.
- Wipe Down: After each use, wipe down the legs and head with a damp cloth to remove dust, dirt, or sand. Pay attention to the leg locks.
- Lubrication: Check your tripod’s manual for lubrication recommendations. Some parts, particularly on pan-tilt heads, might benefit from a tiny amount of silicone grease. Avoid oily lubricants unless specifically instructed.
- Sand/Dust: If sand or grit gets into the leg locks or head mechanisms, it can cause serious damage. Carefully disassemble (if safe to do so per manual) and clean thoroughly. Air blowers can help remove fine particles.
Tripod Accessories: Enhancing Functionality
Consider these additions for an even better experience when you put a camera on a tripod:
- Spiked Feet/Rubber Feet: Many tripods allow you to swap out feet for different terrains (spikes for soft ground like grass or ice, rubber for hard, smooth surfaces).
- Counterweight Bag: A small bag you can fill with rocks, sand, or water bottles to hang from the center column hook for extra stability, especially in windy conditions or with heavy gear.
- L-Bracket: An Arca-Swiss compatible bracket that attaches to your camera body. It allows you to mount your camera vertically (portrait orientation) or horizontally (landscape) without changing the tripod head’s orientation, greatly improving stability for portrait shots and maintaining the camera’s balance.
Conclusion: Master the Mount, Master Your Photography
Congratulations! You’ve just walked through the essential steps of how to put a camera on a tripod. This seemingly simple act is actually a foundational skill for any serious photographer or videographer. A properly mounted camera ensures not only the safety of your valuable equipment but also unlocks a world of creative possibilities, delivering sharper images, smoother videos, and more consistent results.
Remember, practice makes perfect. The more often you attach and detach your camera, the more intuitive and second-nature the process will become. Always prioritize safety: check that quick release plate, wiggle test the connection, and balance your setup. With these steps mastered, you can confidently set up your gear, knowing it’s secure, stable, and ready to capture the breathtaking moments you envision. Now go out there, mount your camera with confidence, and create some stunning work!
🎥 Related Video: How To Put a CAMERA on a TRIPOD Tutorial for Beginners | Manfrotto Tripod
📺 Shawn Dolinski
In this photography or video tutorial for beginners you will learn how to Attach a Camera To a Tripod, how to adjust the height of …
Frequently Asked Questions
What is the purpose of a quick release plate?
A quick release plate is a small, detachable interface that screws onto the bottom of your camera. Its primary purpose is to allow for fast and easy attachment and detachment of your camera from the tripod head, saving time and effort during setup.
Why is it important to balance my camera on the tripod?
Balancing your camera on the tripod is crucial for stability and safety. It ensures the weight is evenly distributed over the tripod’s center of gravity, reducing strain on the tripod head’s locking mechanisms and preventing the entire setup from accidentally tipping over, especially with heavier lenses.
What is the “wiggle test” and why is it important?
The “wiggle test” is a critical safety check performed after mounting your camera. It involves gently trying to wiggle and lift the camera to ensure it is rock-solid and securely locked onto the tripod head. This simple test confirms a proper connection and can prevent your valuable camera from falling.
Can I use any quick release plate with any tripod head?
No, quick release plates are not universally compatible. There are different systems, such as Arca-Swiss style, Manfrotto style, and various proprietary designs. Always ensure your quick release plate matches the clamping mechanism on your specific tripod head.
How do I know if my tripod is level?
Many tripods and tripod heads come with a built-in bubble level. Use this level to ensure the tripod’s base and/or the camera itself is perfectly horizontal. If your tripod doesn’t have one, you can purchase a small hot-shoe mounted bubble level for your camera.
Should I remove the quick release plate from my camera when not using the tripod?
It’s generally a good practice to remove the quick release plate when not using a tripod. This reduces bulk, prevents the plate from snagging on things, and can sometimes provide better ergonomics for handheld shooting. However, many photographers leave it on for convenience if they frequently switch between handheld and tripod use.